Mushroom Man Crochet Pattern Approx. 6-Inch Amigurumi
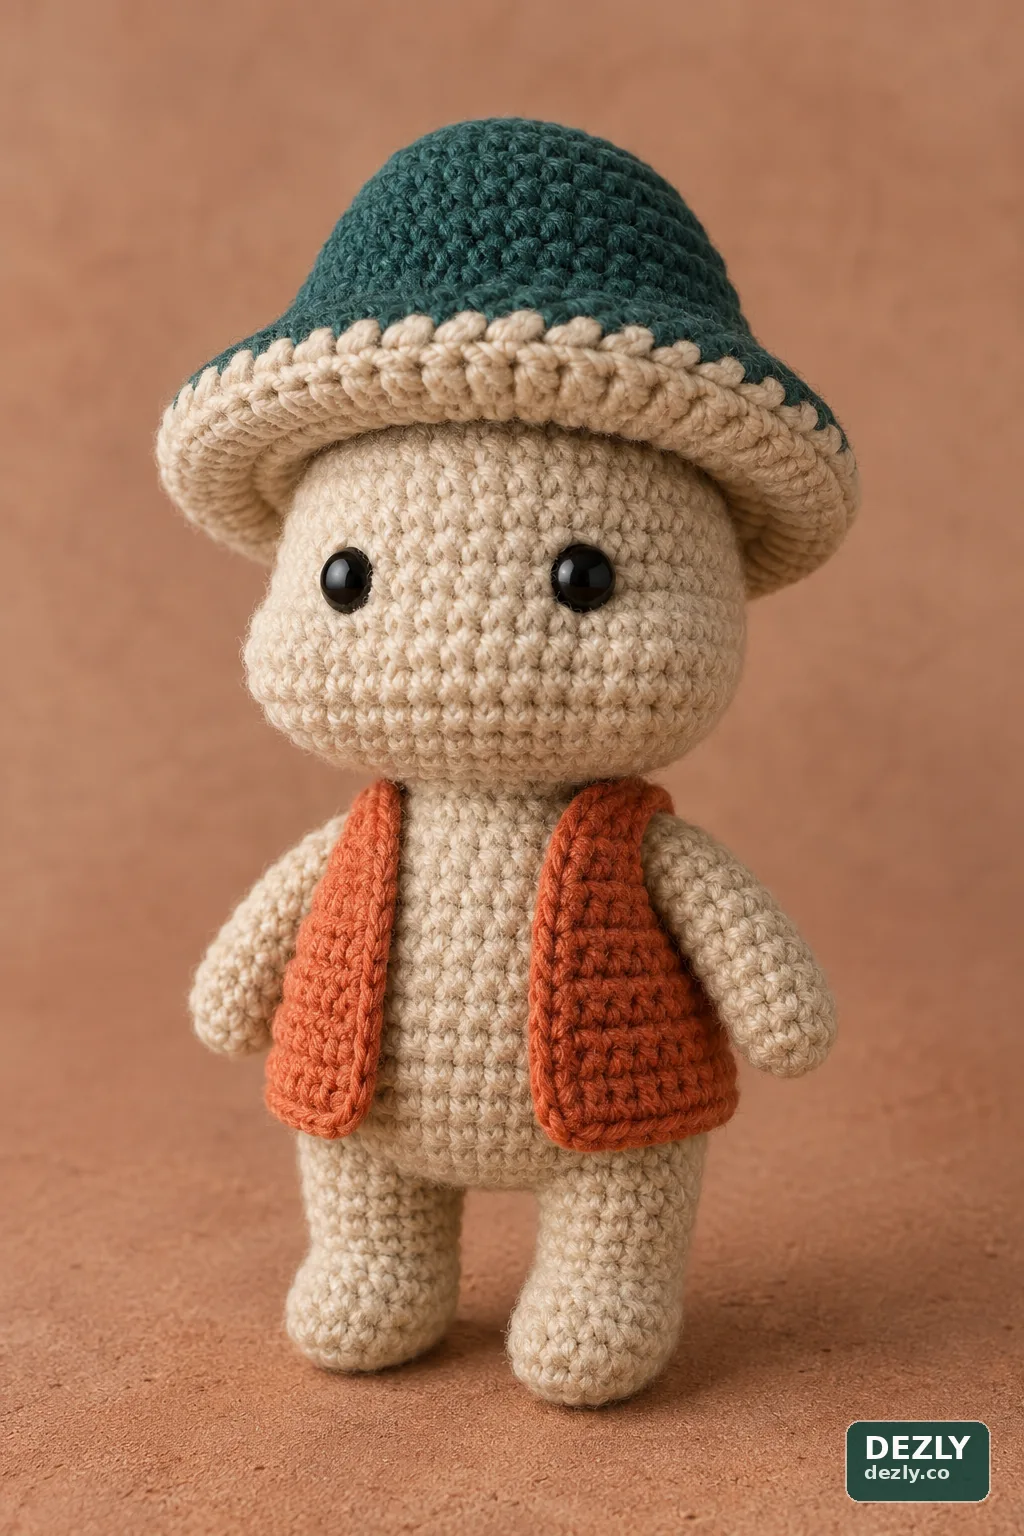
Crochet a woodland mushroom character with shaped cheeks, a seamless joined body, a softly flared two-layer cap, and a removable vest. Follow the construction in order, then use the assembly notes to align the cap layers and finish the face safely.
- Construction
- Joined body + layered cap
- Hook
- 3.75 mm
- Yarn
- Worsted weight
- Length
- 1,841 words · 9 min
Read the sizing note and abbreviations first. Work the pieces in order, count every round, and open any image for a full-screen view with keyboard navigation.
Materials, sizing, and pattern notes
Materials and tools
- 3.75 mm crochet hook
- Worsted-weight yarn in a body color, cap color, brim color, and vest color
- Two 10 mm safety eyes, or black yarn or embroidery thread for embroidered eyes
- Fiberfill
- Stitch markers
- Yarn needle
- Scissors and pins
Before you begin
- Finished sample
- Approximately 6 in / 15 cm tall; yarn, tension, and stuffing can change the result
- Skills used
- Magic ring, continuous rounds, increases, decreases, BLO double crochet, chain spaces, and seaming
- Hook
- 3.75 mm
- Yarn
- Worsted weight
- Gauge
- Not provided; use a dense fabric that keeps filling from showing
- Yarn quantity
- Not provided in the source pattern
- Terminology
- US crochet terms
Work the single-crochet pieces in continuous spirals unless a section explicitly says to join or turn. Place a stitch marker in the first stitch of every round, count before moving on, and keep the same yarn weight and tension across paired pieces.
Abbreviations and conventions
| Abbreviation | Meaning |
|---|---|
| mr | magic ring |
| st / sts | stitch / stitches |
| ch | chain |
| sc | single crochet |
| inc | work 2 single crochets in the same stitch |
| dec | single-crochet decrease over the next 2 stitches |
| BLO | back loop only |
| dc | double crochet |
| dc inc | work 2 double crochets in the same stitch |
| ss | slip stitch |
Parentheses show a sequence to repeat. Stitch totals appear in brackets. On the joined brim rounds, the beginning ch 2 does not count as a stitch.
Head
The cheek shaping is added across Rounds 14–17. Keep the increases and decreases centered opposite one another so the front of the head remains balanced.
Round 1mr, sc 6 [6]
Round 2inc × 6 [12]
Round 3(sc 1, inc) × 6 [18]
Round 4sc 1, inc, (sc 2, inc) × 5, sc 1 [24]
Round 5(sc 3, inc) × 6 [30]
Round 6sc 2, inc, (sc 4, inc) × 5, sc 2 [36]
Round 7(sc 5, inc) × 6 [42]
Rounds 8–13sc around for 6 rounds [42]
Round 14sc 13, inc × 3, sc 10, inc × 3, sc 13 [48]
Round 15sc 14, (inc, sc 1) × 3, sc 9, (inc, sc 1) × 3, sc 13 [54]
Round 16sc 14, (dec, sc 1) × 3, sc 9, (dec, sc 1) × 3, sc 13 [48]
Round 17sc 13, dec × 3, sc 10, dec × 3, sc 13 [42]
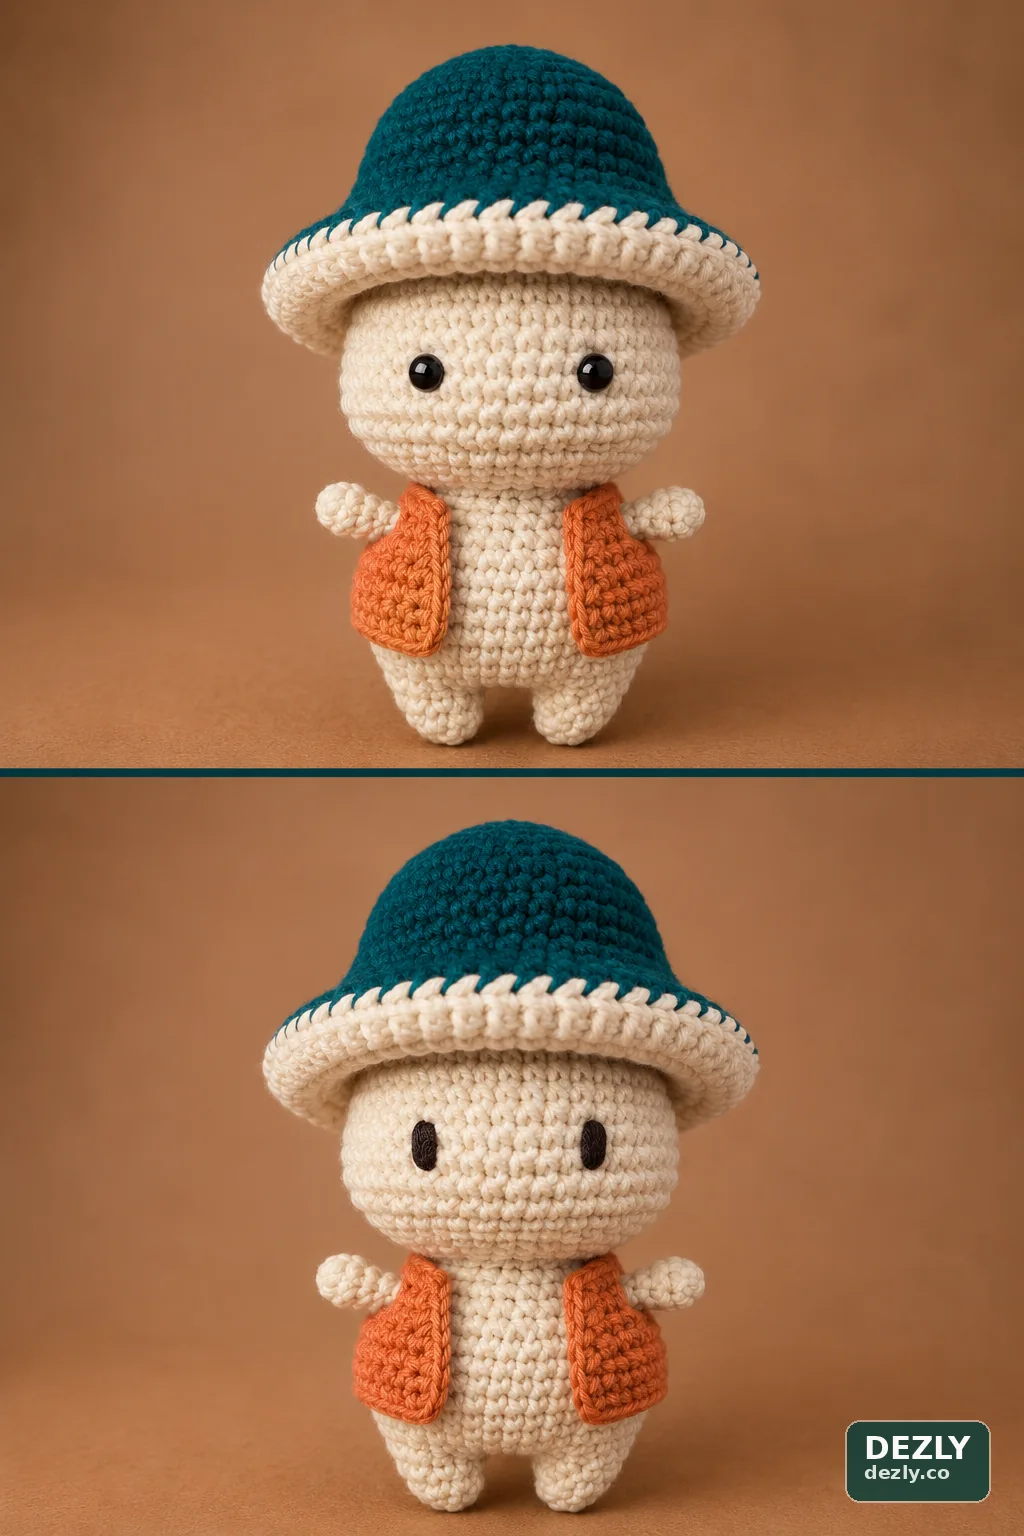
If you are using safety eyes, place them between Rounds 13 and 14 with their centers approximately 6–7 stitches apart. Confirm that they line up with the outer edges of the cheek shaping before securing the washers.
Round 18(sc 5, dec) × 6 [36]
Round 19sc 2, dec, (sc 4, dec) × 5, sc 2 [30]
Round 20(sc 3, dec) × 6 [24]
Round 21sc 1, dec, (sc 2, dec) × 5, sc 1 [18]
Fasten off with a long sewing tail. Stuff to medium firmness, distributing the filling into the cheek curves without stretching the stitches.
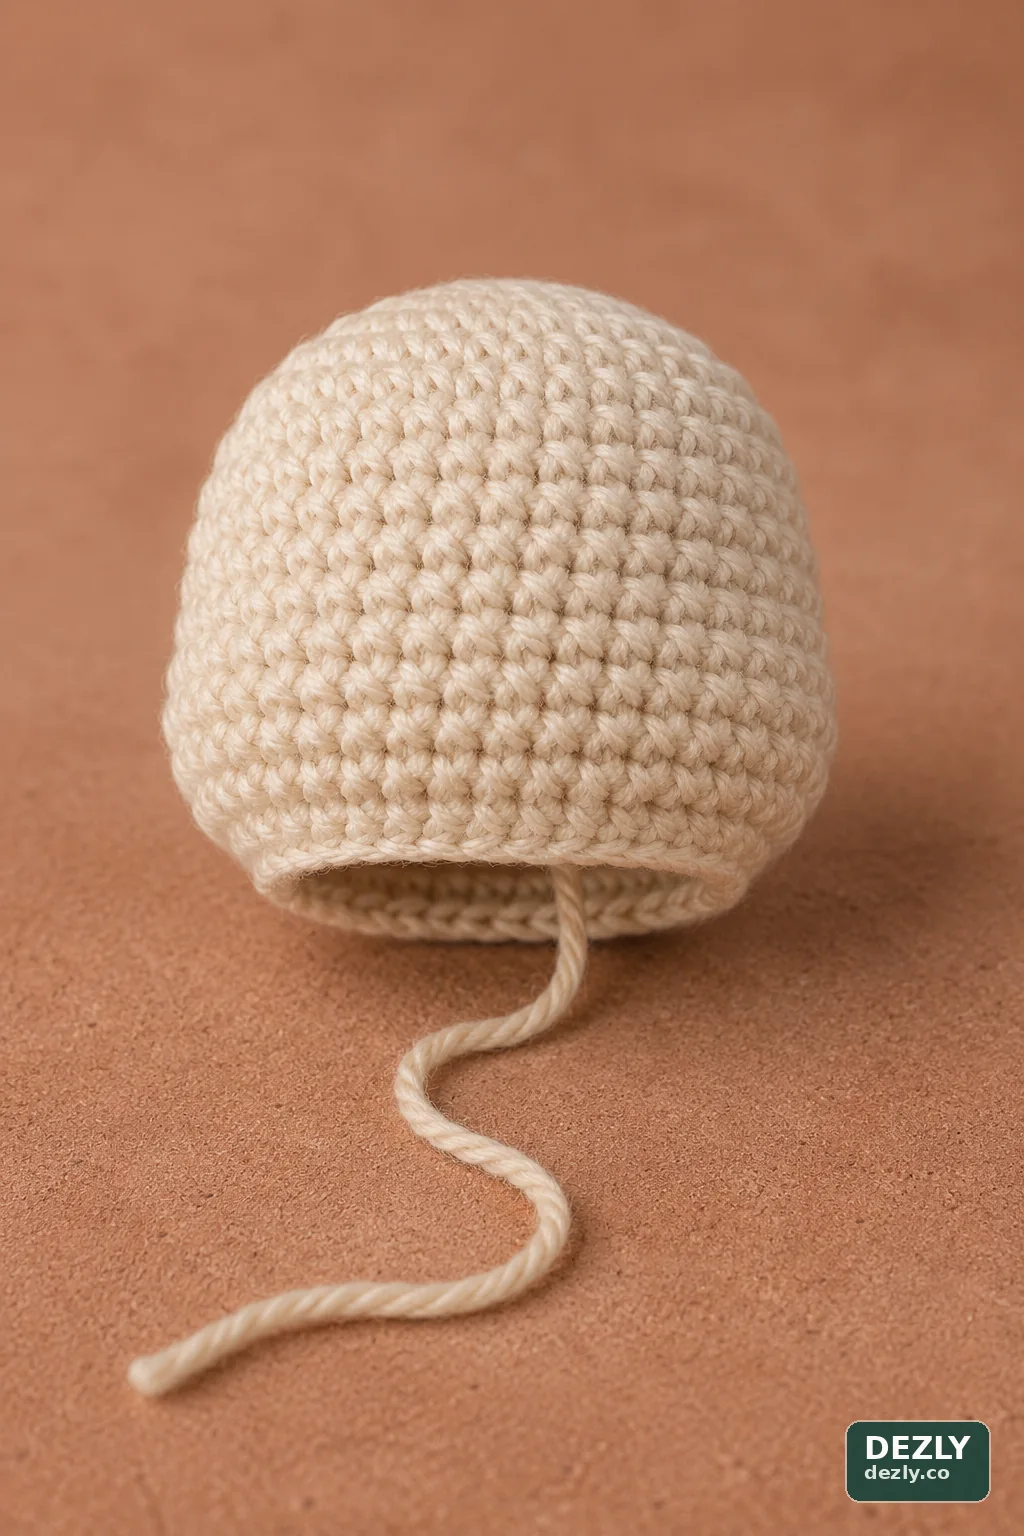
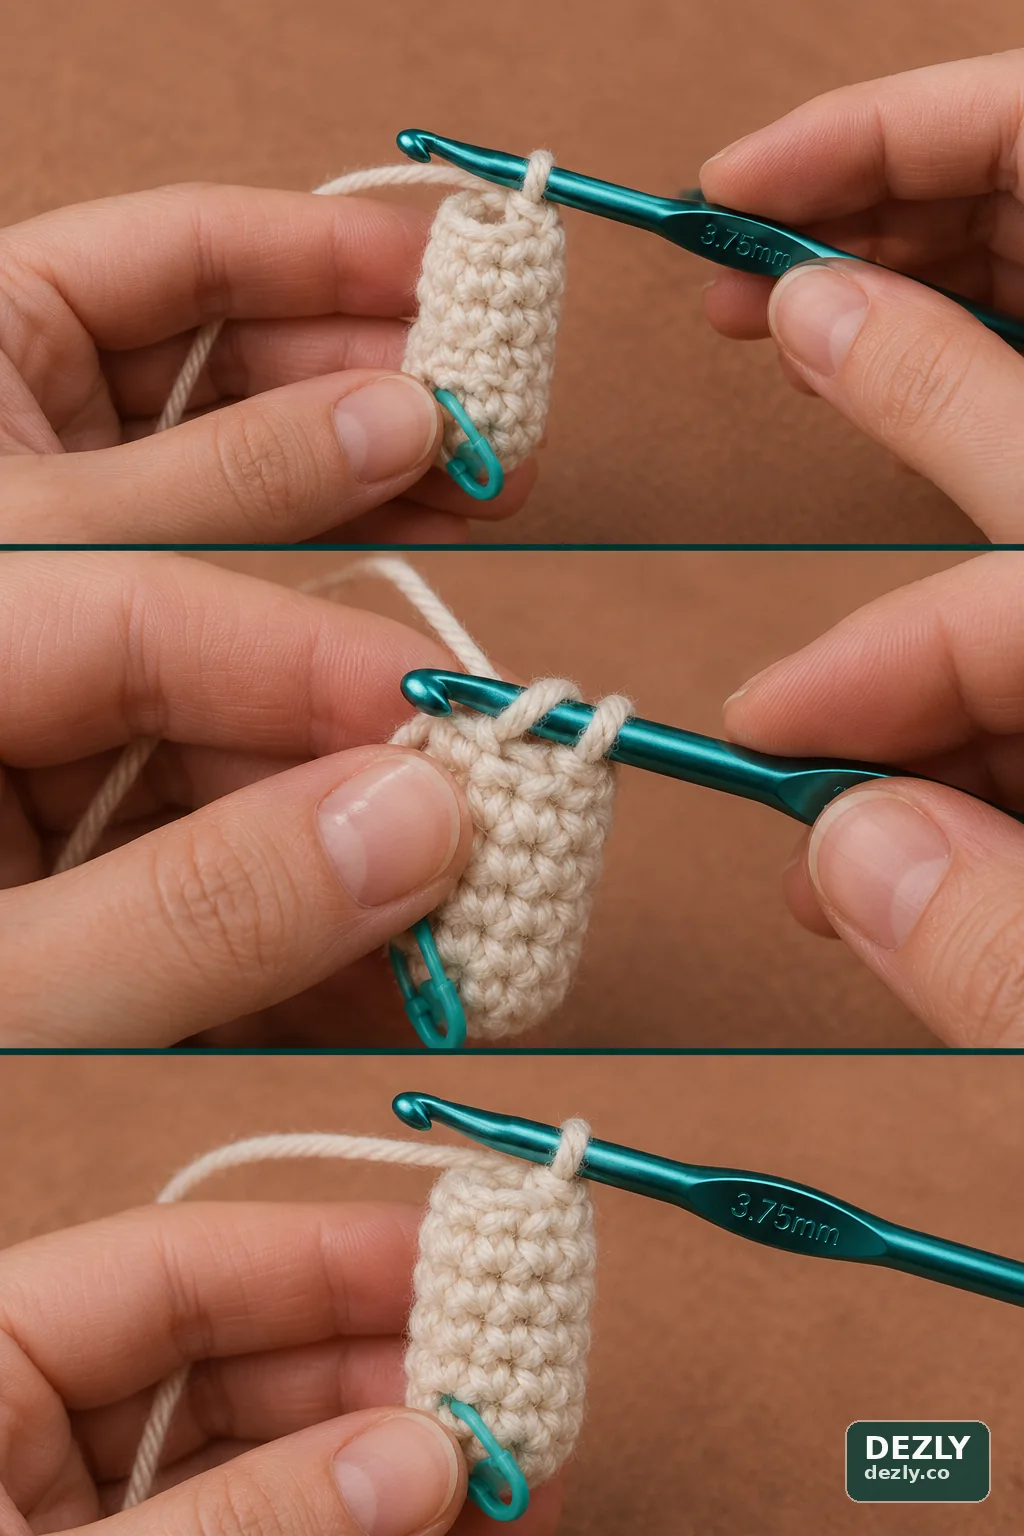
Arms make 2
Round 1mr, sc 6 [6]
Rounds 2–5sc around for 4 rounds [6]
CloseFlatten the opening and sc through both layers across the final row [3]
Fasten off. Leave the arms unstuffed for a flatter shape, or add only a small amount of filling before closing.
Legs make 2
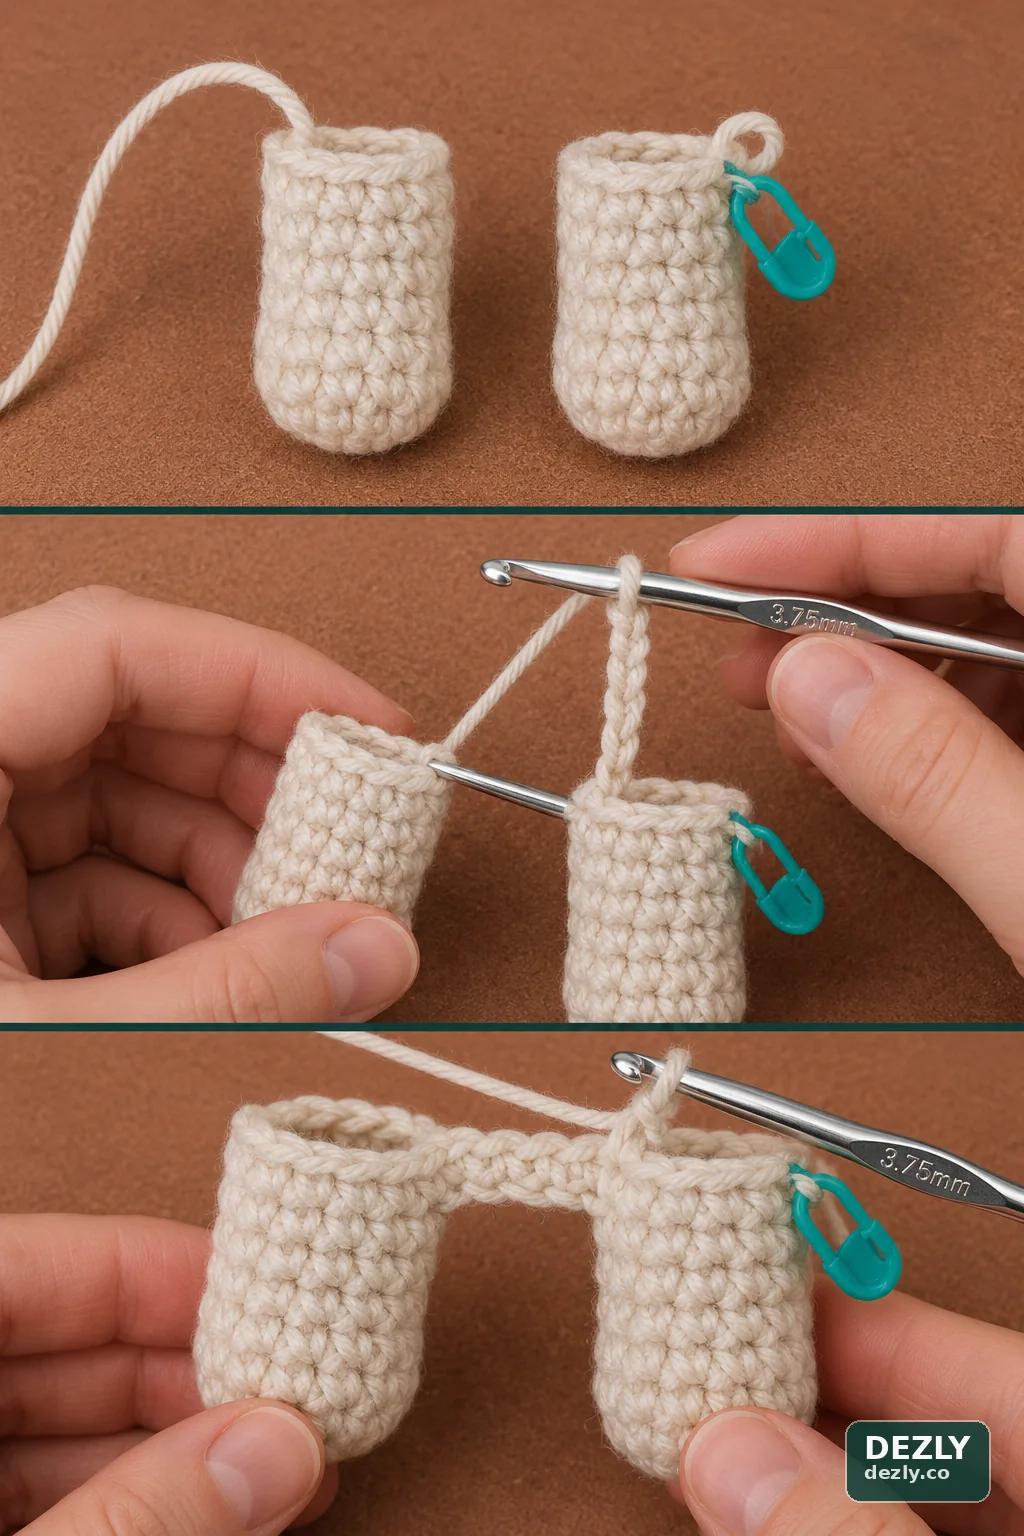
Complete both legs through Round 4. Fasten off the first leg only; keep the working yarn attached to the second leg for the body join.
Round 1mr, sc 6 [6]
Round 2sc around [6]
Round 3(sc 1, inc) × 3 [9]
Round 4sc around [9]
Join the legs and crochet the body
Continue from the second leg. Face both feet forward before joining, and keep the three-chain bridge untwisted.
Round 5ch 3, sc into the first leg and work 9 sc around it; sc 3 across one side of the chain, sc 9 around the second leg, then sc 3 across the other side of the chain [24]
Round 6inc, sc 7, inc, sc 3, inc, sc 7, inc, sc 3 [28]
Round 7inc, sc 9, inc, sc 1, inc, sc 1, inc, sc 9, inc, sc 1, inc, sc 1 [34]
Round 8sc around [34]
Round 9sc 6, inc × 2, sc 15, inc × 2, sc 9 [38]
Rounds 10–12sc around for 3 rounds [38]
Round 13sc 8, dec, sc 18, dec, sc 8 [36]
Round 14sc 2, dec, (sc 4, dec) × 5, sc 2 [30]
Round 15(sc 3, dec) × 6 [24]
Round 16sc 5, crochet the first flattened arm through the next 3 body stitches, sc 8, crochet the second arm through the next 3 body stitches, sc 5 [24]
Check the arm alignment before completing the round. If the first five stitches do not place an arm at the side, shift the attachment points while preserving 8 body stitches between the three-stitch arm joins. You may also sew the arms on after the body is finished.
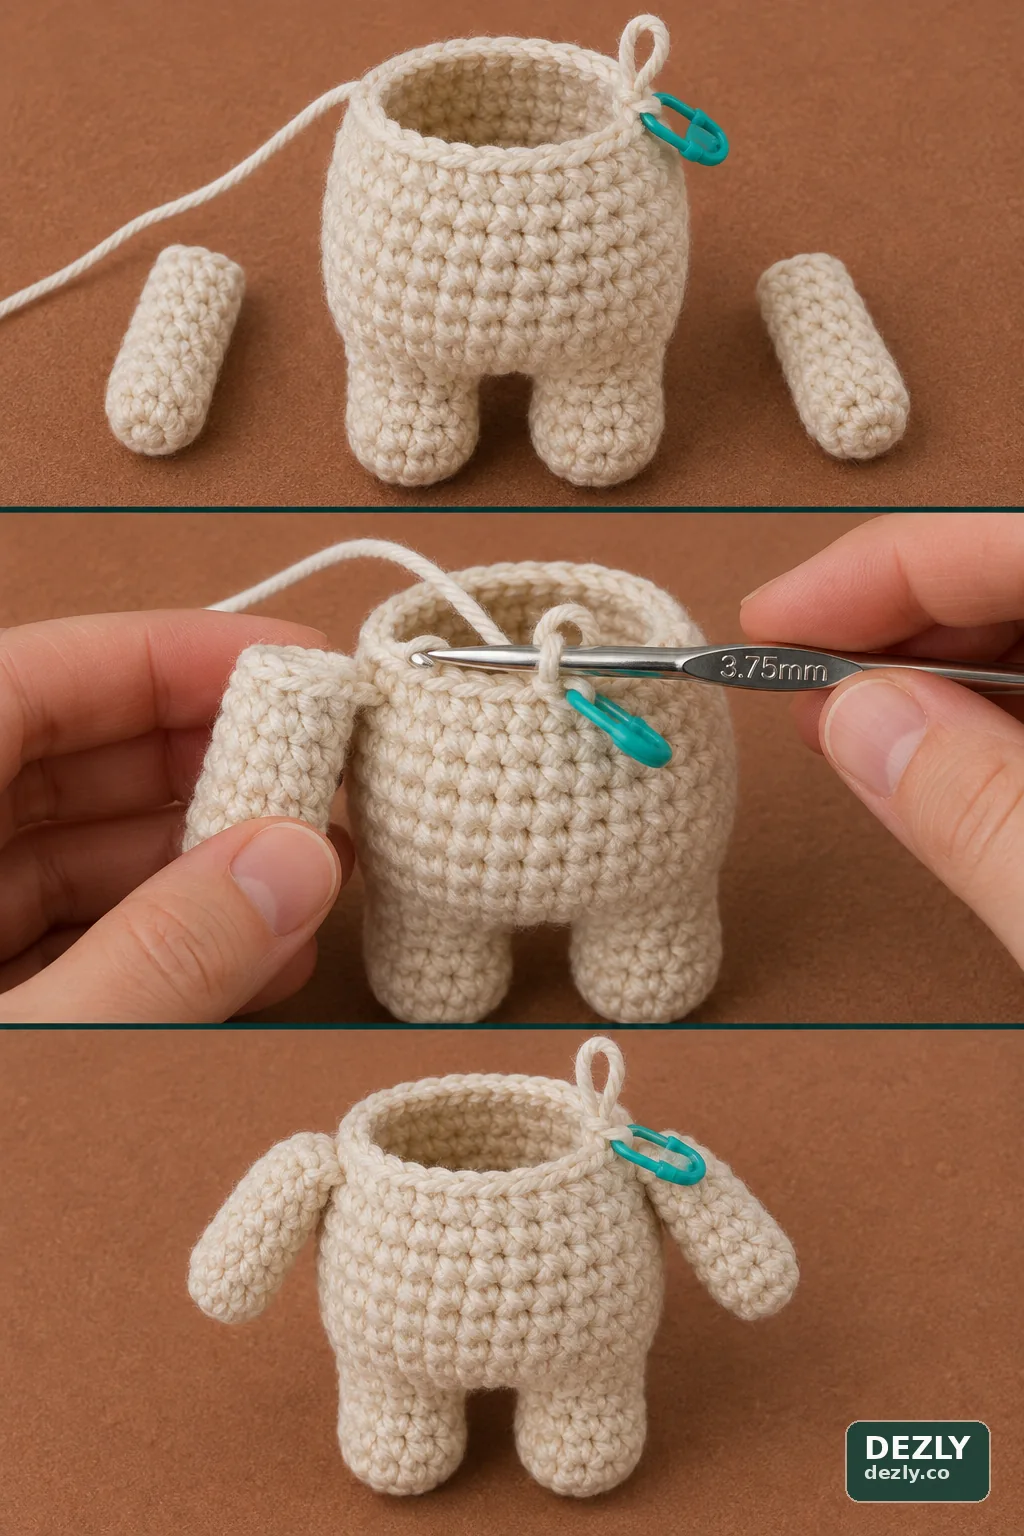
Round 17sc 1, dec, (sc 2, dec) × 5, sc 1 [18]
Round 18sc around [18]
Finish stuffing the body to medium firmness. Fasten off and weave in the tail.
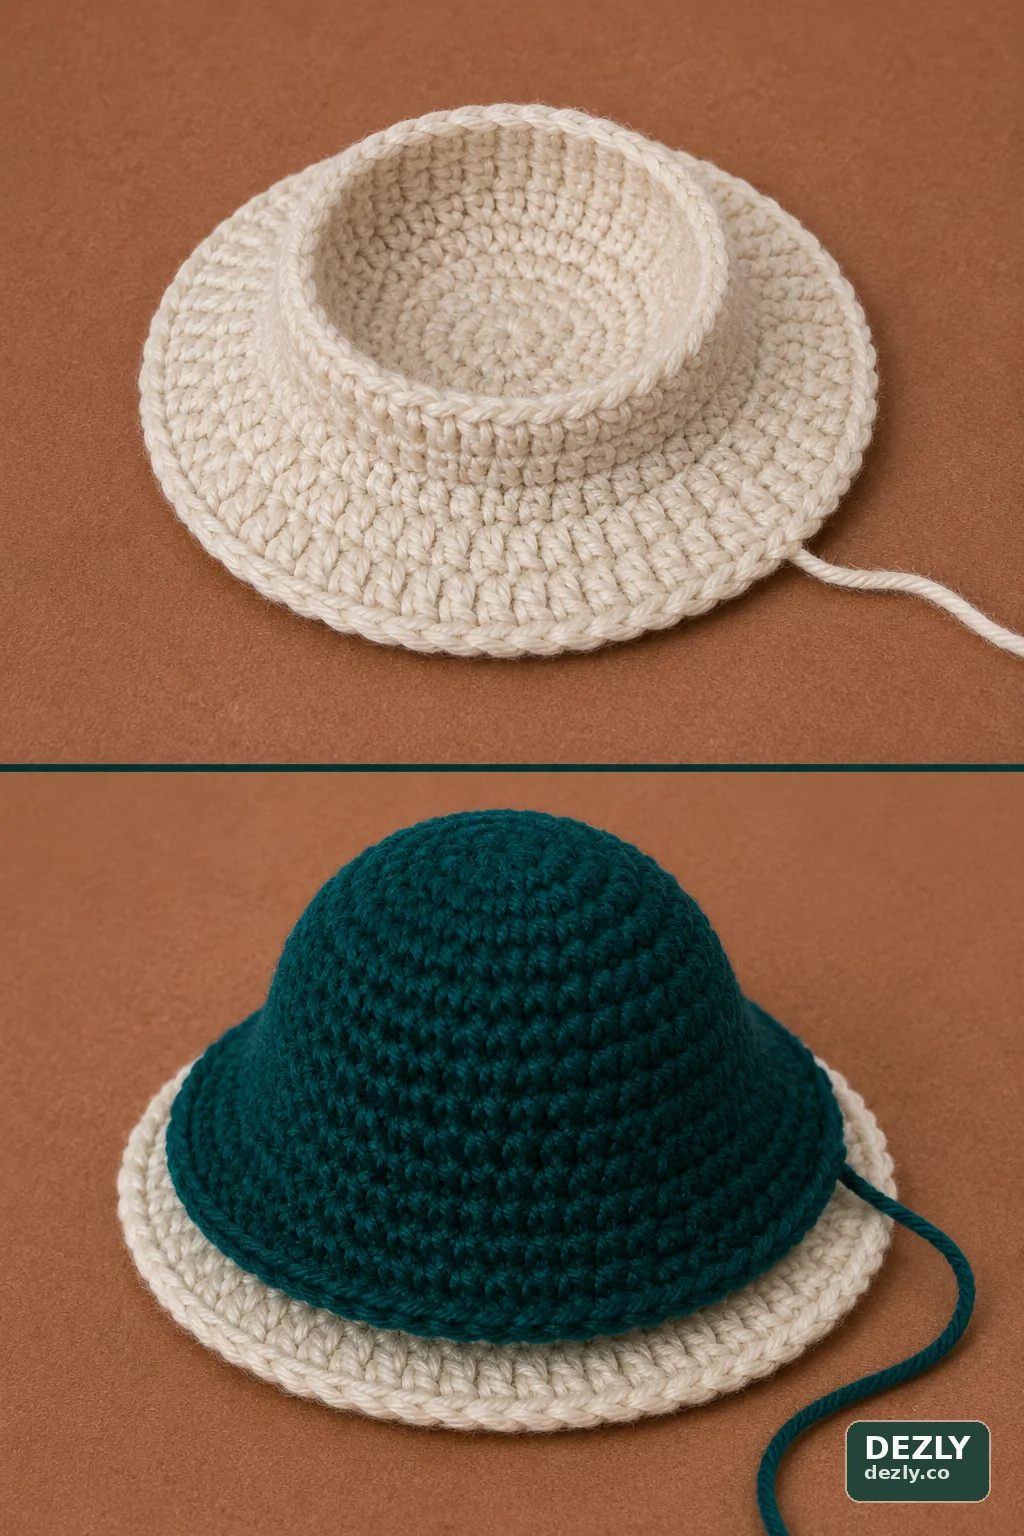
Mushroom cap bottom
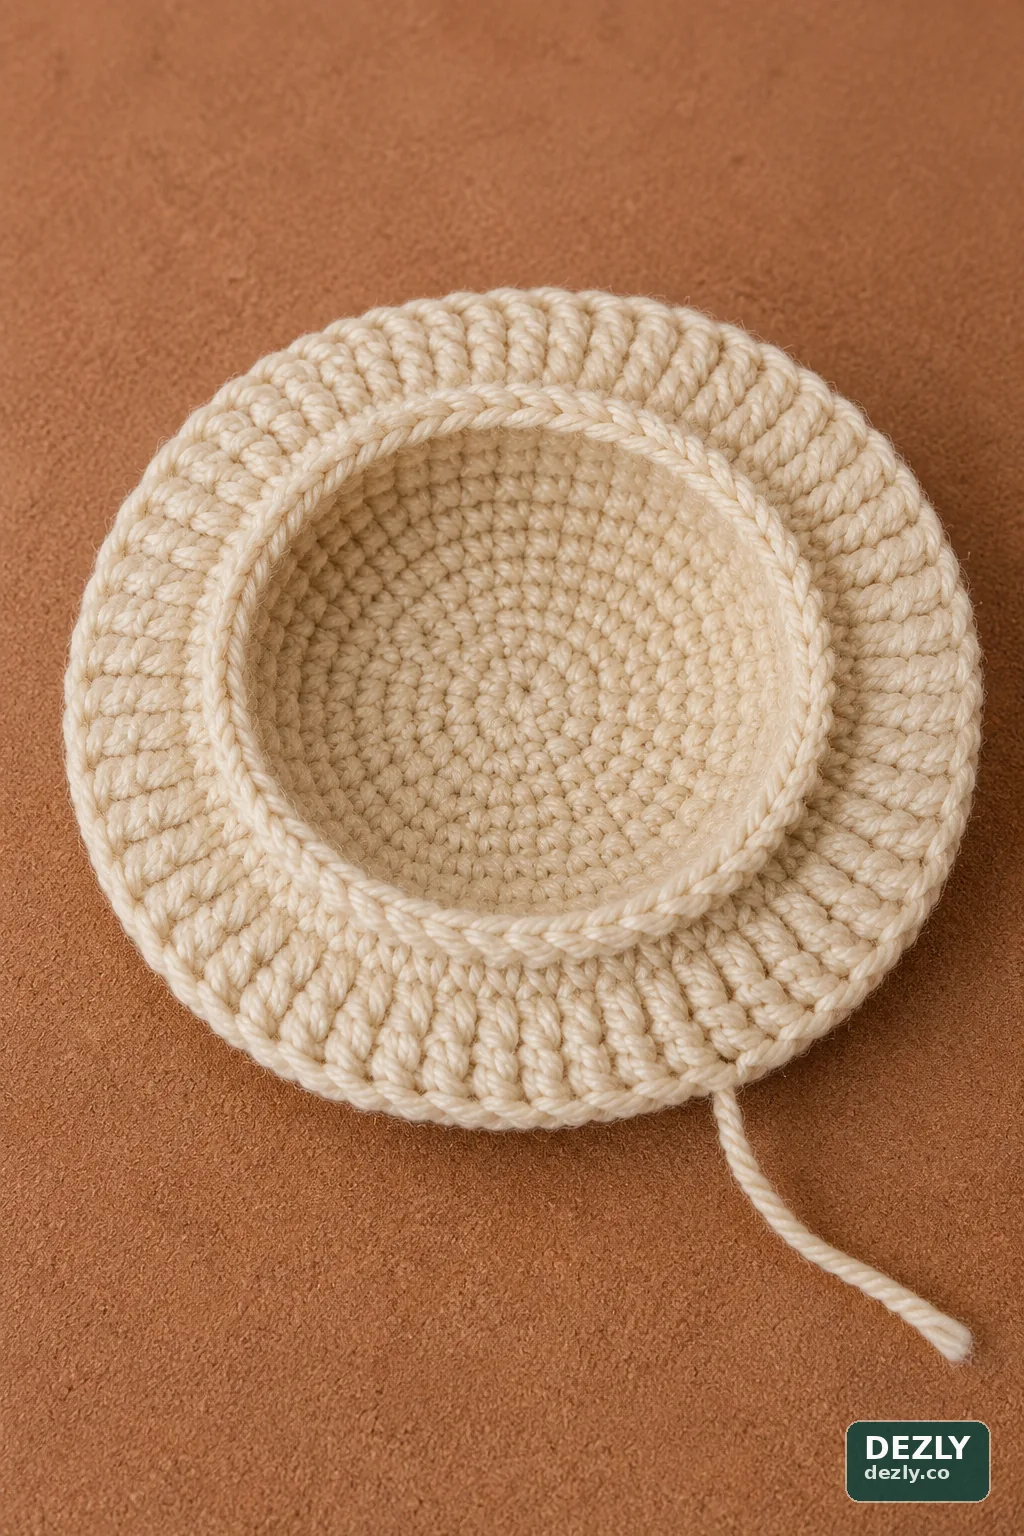
Rounds 1–10 form the shallow underside in continuous single-crochet rounds. Rounds 11–12 are joined double-crochet rounds worked through the back loops to create the flared brim.
Round 1mr, sc 6 [6]
Round 2inc × 6 [12]
Round 3(sc 1, inc) × 6 [18]
Round 4sc 1, inc, (sc 2, inc) × 5, sc 1 [24]
Round 5(sc 3, inc) × 6 [30]
Round 6sc 2, inc, (sc 4, inc) × 5, sc 2 [36]
Round 7(sc 5, inc) × 6 [42]
Rounds 8–10sc around for 3 rounds [42]
Round 11ss into the first st and ch 2; starting in the same st and working BLO, (dc 3, dc inc) × 10, dc 2; join with ss to the ch-2 space [52 dc]
Round 12ch 2 and dc in the same st, dc 1, dc inc, (dc 4, dc inc) × 9, dc 4; join with ss to the ch-2 space [62 dc]
Fasten off and turn the piece inside out. The beginning ch 2 on each joined round is not included in the stitch total.
Mushroom cap top
Round 1mr, sc 6 [6]
Round 2inc × 6 [12]
Round 3(sc 1, inc) × 6 [18]
Round 4sc 1, inc, (sc 2, inc) × 5, sc 1 [24]
Round 5(sc 3, inc) × 6 [30]
Round 6sc around [30]
Round 7sc 2, inc, (sc 4, inc) × 5, sc 2 [36]
Round 8sc around [36]
Round 9(sc 5, inc) × 6 [42]
Round 10sc around [42]
Round 11sc 3, inc, (sc 6, inc) × 5, sc 3 [48]
Rounds 12–13sc around for 2 rounds [48]
Round 14(sc 7, inc) × 6 [54]
Round 15sc 4, inc, (sc 8, inc) × 5, sc 4 [60]
Round 16(sc 9, inc) × 6 [66]
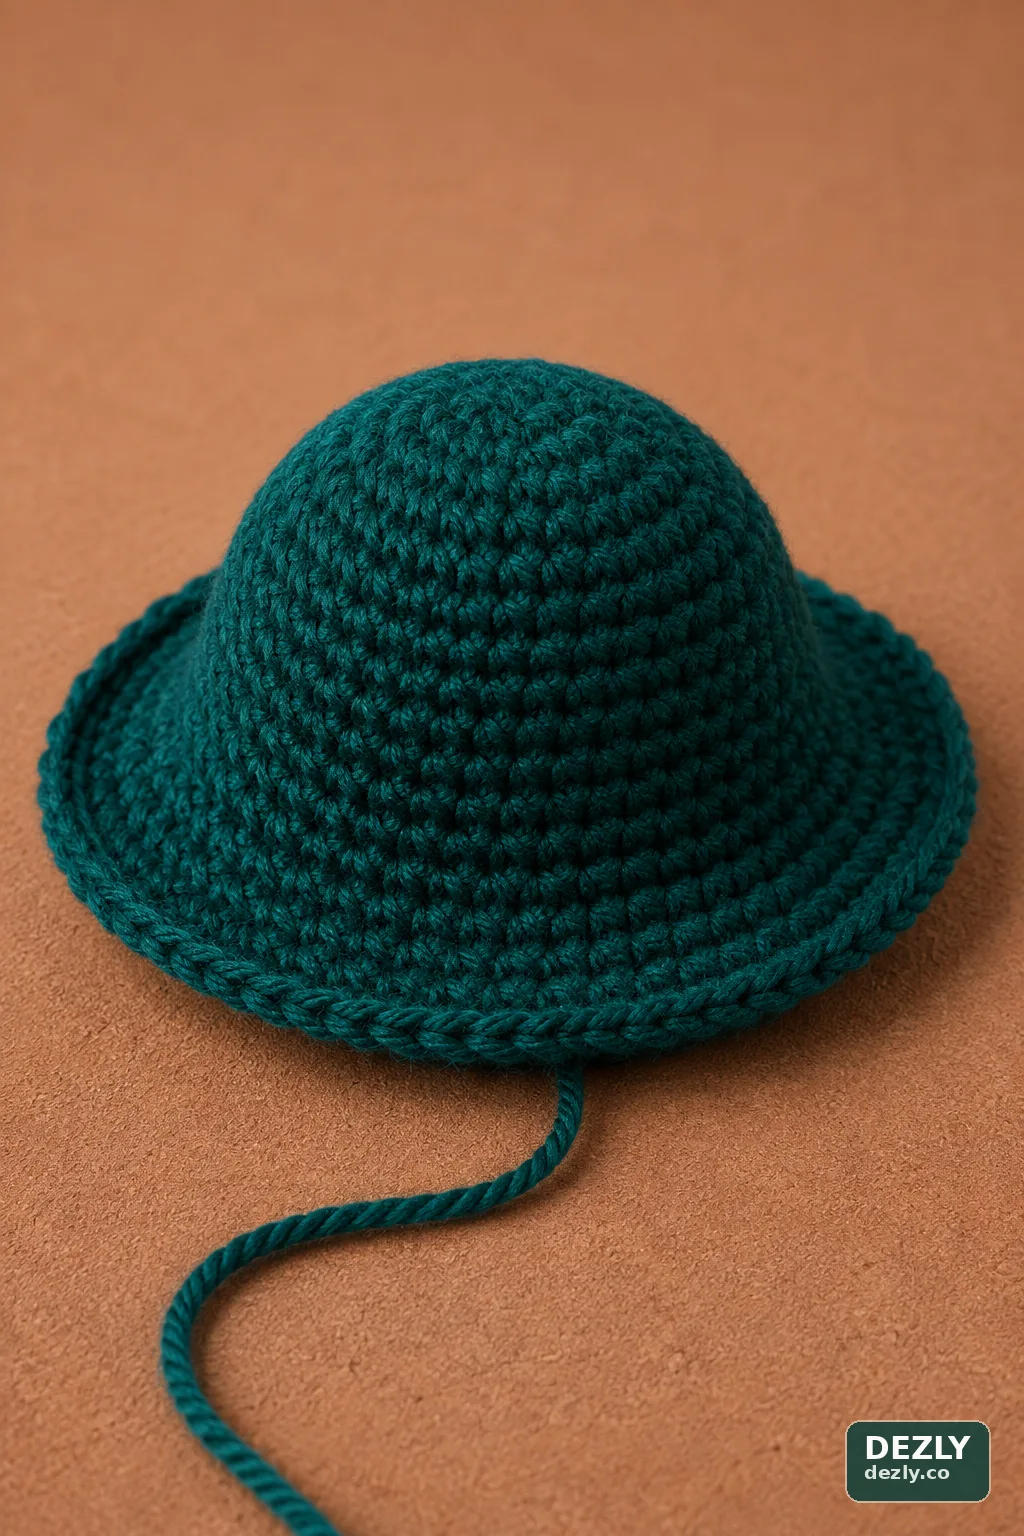
Fasten off with a long tail for joining the two cap layers.
Removable vest
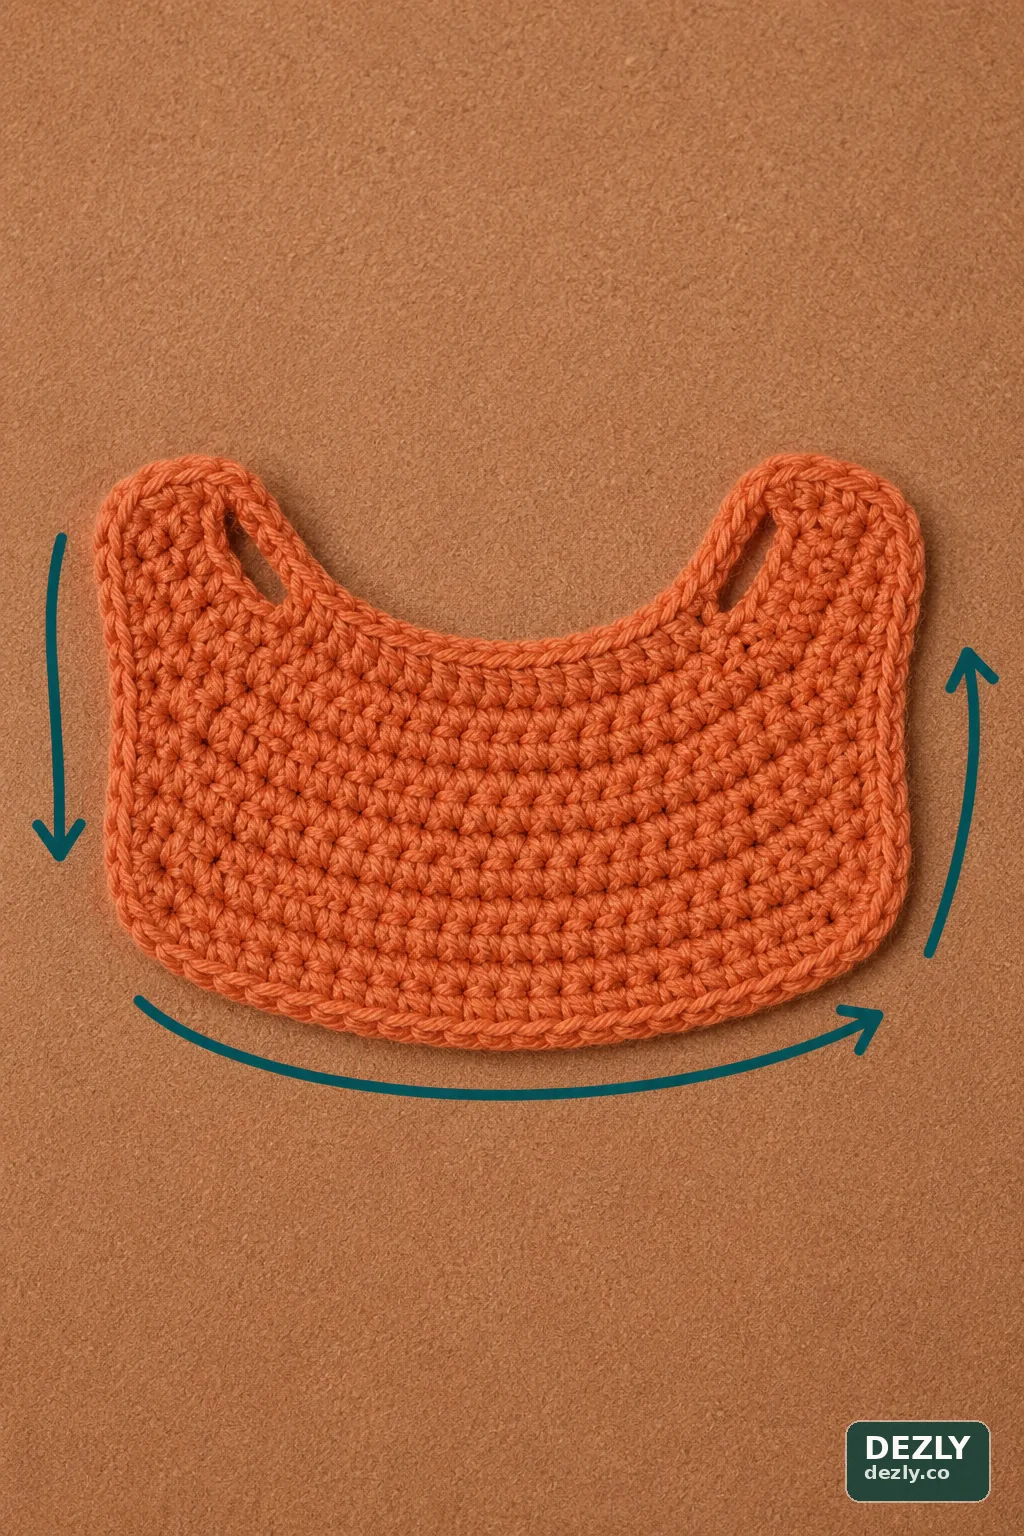
The vest is worked flat from the lower edge upward. The two chain spaces in Row 5 form the arm openings.
Foundationch 37
Row 1Starting in the second ch from the hook, sc 36, ch 1, turn [36]
Row 2sc 36, ch 1, turn [36]
Row 3(dec, sc 4) × 3, (sc 4, dec) × 3, ch 1, turn [30]
Row 4(dec, sc 3) × 3, (sc 3, dec) × 3, ch 1, turn [24]
Row 5sc 2, ch 3, skip 3 sts, sc 14, ch 3, skip 3 sts, sc 2, ch 1, turn [24 including chain spaces]
Row 6sc across, working 3 sc into each ch-3 space [24]
At the end of Row 6, ch 1 and sc evenly down the first side. Ch 1 at the corner, sc evenly across the foundation edge, ch 1 again, and sc evenly up the second side. Fasten off and weave in the ends.
Assembly and finishing
- 1
Pin the head to the body with the cheek shaping facing forward. Sew around the 18-stitch neck opening, adding a final amount of stuffing before closing so the head remains upright.
- 2
Place the cap top over the cap bottom with wrong sides together. The 62-stitch bottom is intentionally wider at the brim, while the top edge has 66 stitches.
- 3
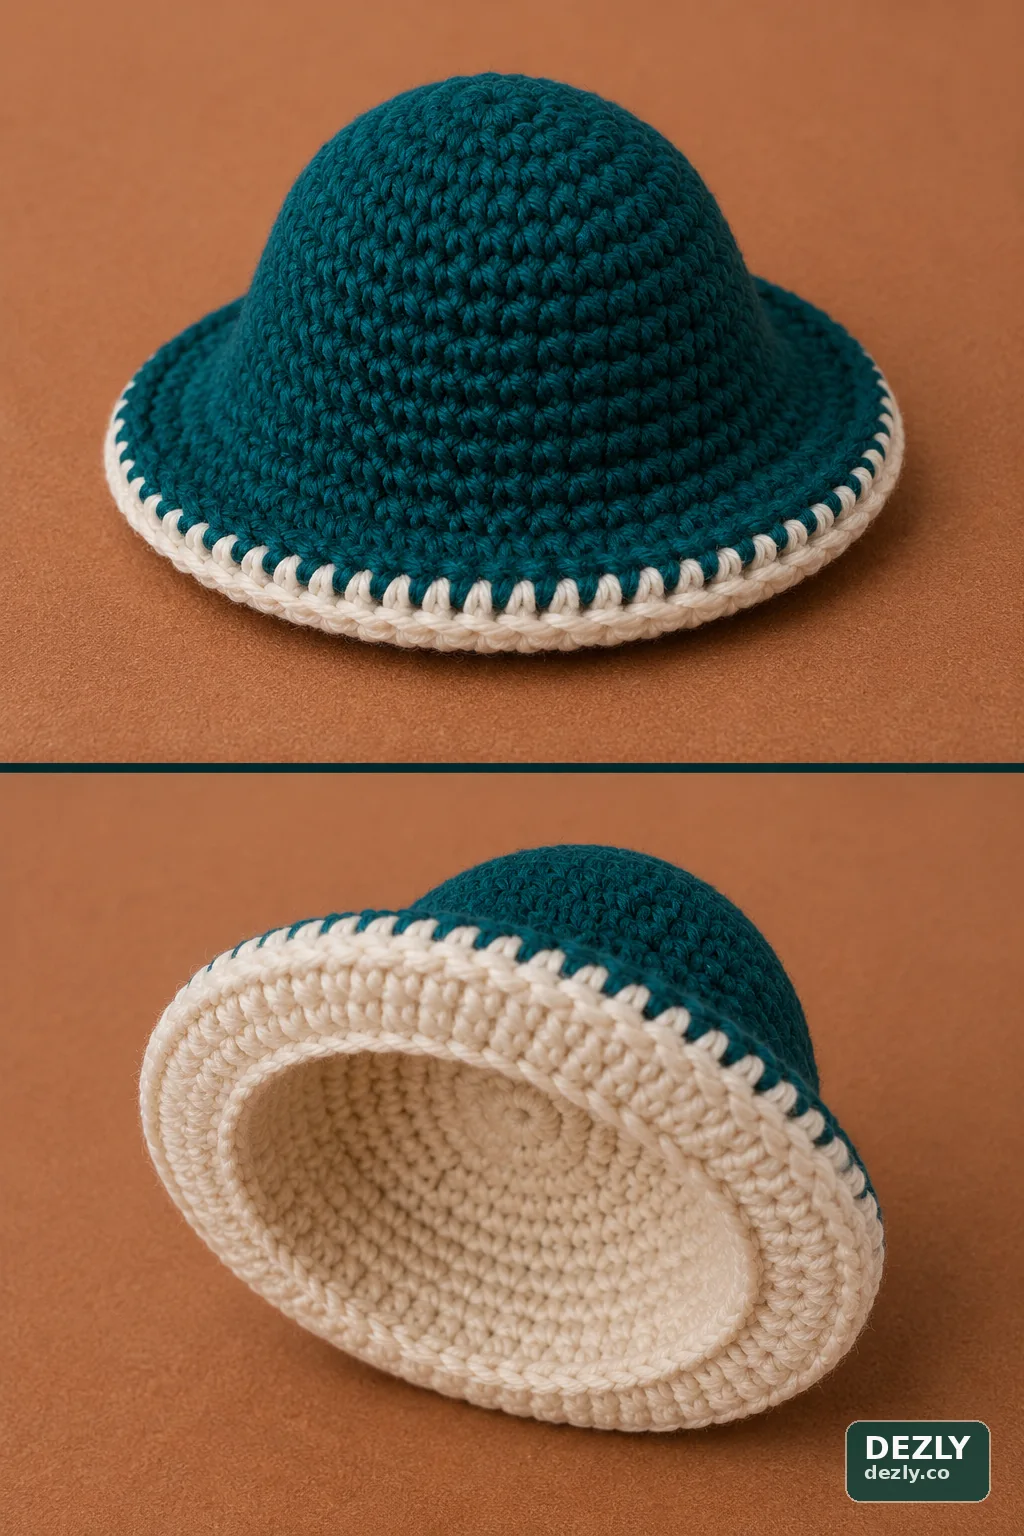
Mark four quarter points on both layers. Sew through the loops of the final rows, distributing the four extra stitches from the cap top evenly around the seam instead of forcing one-to-one alignment.
- 4
Before closing the cap, add only a small amount of filling beneath the crown if you want more definition. Leave the brim unstuffed so it can curve upward and sit on the head.
- 5
Place the cap on the head and dress the doll in the removable vest. If you did not use safety eyes, embroider two secure eye shapes now and hide the yarn tails inside the head.
Final checks
- Count and secure every seam, then hide all remaining yarn tails inside the work.
- Check that the head stays upright and that both arms and legs sit symmetrically.
- Confirm that the brim curves without puckering and that the cap layers are joined evenly.
- Try the vest on the doll and make sure each arm passes through its opening without stretching the edge.
- If the doll uses plastic eyes, recheck the washers and keep the finished item away from children under three.
Your mushroom amigurumi is complete. Changing colors can turn the same construction into a woodland, autumn, or storybook character while the stitch counts remain unchanged.
Know someone who would make this mushroom doll?
Send the canonical article link so they receive the complete instructions and image sequence.